Photography Articles - How To: Water Drops
This article explains a simple setup that you can do in your kitchen at home to get great water drip and splash photography.
This is written to be a starting-point and you are encouraged to play around with different setups.
If you're wondering, I shot about 200 frames to get the "good" examples photos you see here, so don't be discouraged if your timing is off or you aren't getting neat splashes.
What you will need
The following list is what I used, but you can always substitute similar components, such as SB-600 flash heads instead of the SB-800.
- A camera. Obviously you'll need this, but I want to take some time to discuss the level of camera needed. In this example I use a dedicated quality macro lens, but you can get decent macro photography with a point-and-shoot camera. But, this example also uses the Nikon CLS (Creative Lighting System) where the camera works with the remote flash units to wirelessly, and near instantly, create the proper exposure. This works with either a CLS-equipped camera (D300, D80, etc) or with a CLS-sender flash head such as the SB-800. The whole system works by actually pre-firing the flashes so that the camera can judge the exposure they can provide, then the camera sends a series of pulses (an IR signal, like the one your remote uses to control the TV) wish its own flash to instruct the remotes on what level to fire at. This all happens in the blink of an eye, but it is important to note that this does introduce a lag from when you press the shutter button to when the actual photo is recorded.
- Two CLS Flash Heads. In my example I use two SB-800s but you could use two SB-600s or the newer SB-900s, but note that the SB-400s will not work for this. Please note that in the example video I use the add-on battery packs for my flashes. You do not need these. I keep these on my flashes so I don't mix up battery sets.
- A macro lens. In this example I used the 105mm f/2.8 AFS VR for this shoot, but you can use the similar non-VR macro, the 105mm f/2.8D lens. The 35-7omm f/2.8D also does a good job at macro, but you will surely have to position your tripod to be much closer to the water to fill the frame with the action.
- A tripod. For this shoot I used my Bogen - Manfrotto 055XPROB Tripod with Bogen - Manfrotto 322RC2 Ball Head because the ball-head let me quickly position the camera as I needed. I could also easily reposition the camera for a vertical shot.
- A colored gel. These are available in photography and lighting stores. Also, some theatrical houses will sell giant sheets for low costs and you can cut them up and share them with your photo-friends. I have heard of some people using the colored food-wrap, but these are not designed for the heat that your flash produces. I would be further worried about them if you seal them in a bag with the flash.
- A glass lasagna pan. In the example I use one that has a purplish coloring to it. This did not seem to matter in the resulting photographs, but if you have a clear one available I would certainly recommend that you use that.
- A sink that can support the lasagna pan itself, or some other means to keep it raised in the sink. If your pan doesn't fit your sink you can try using towels or other padding to keep it in place.
- Black paper for the background. I had some scrap paper laying around from my studio's backdrop paper and I cut some to fit. I had to fold the top of mine over to make a flat edge to keep it from curling over onto itself.
Option Items
These are things that I found helpful or safer and if you have them available then you may want to consider using them. They are not expressly needed to do the setup as seen in the video.
- Plastic zip-top bag. You can put the one flash in this to keep it from getting wet. I found that I preferred to take the risk of getting things wet (it hasn't happened) so I could more easily move things around, and change gels. If your lasagna pan doesn't fit your sink like mine did, and you have to use another support system, then I would really recommend the bag to reduce the risk of ruining your flash.
- Close-up Flash Kit. Not everyone has one, but it makes for some pretty nice lighting. I have the Nikon R1 kit which is a ring set that includes two Nikon SB-R200 lights.
- More flash heads. You can certainly experiment with other light locations, directions, and intensities.
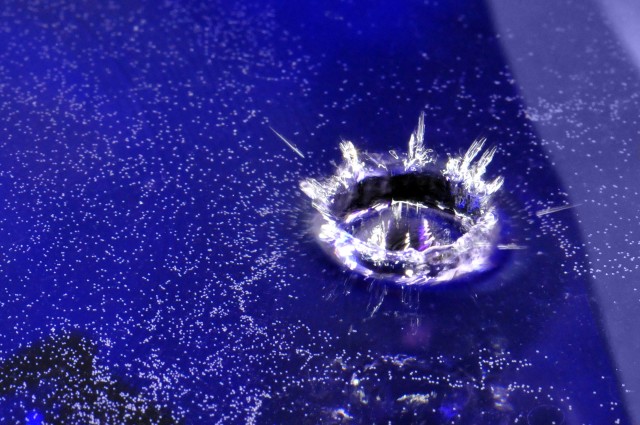
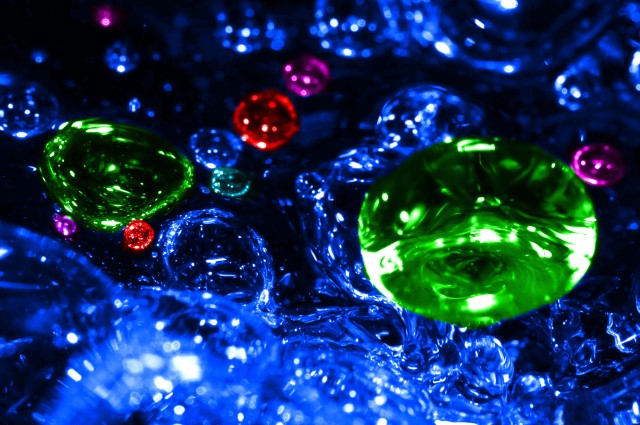
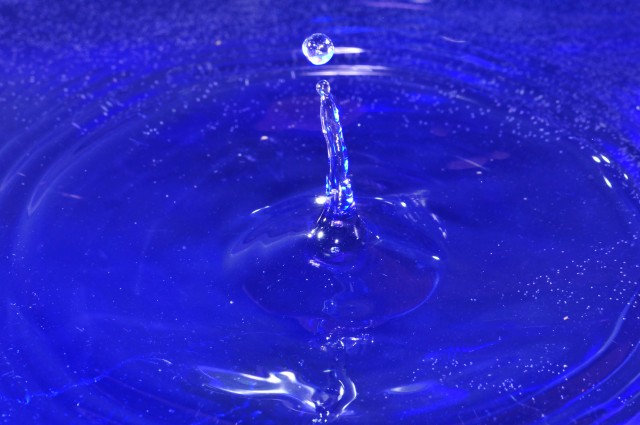
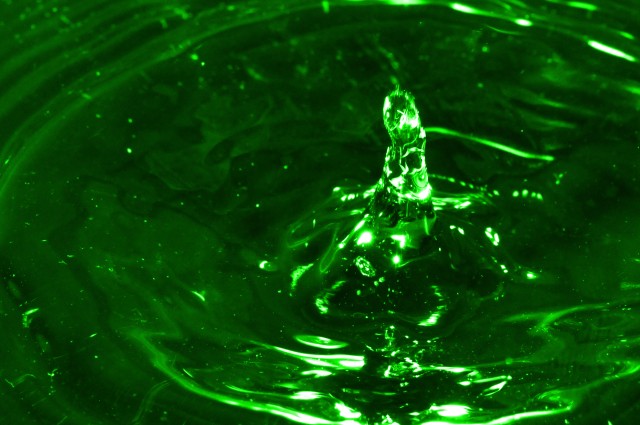
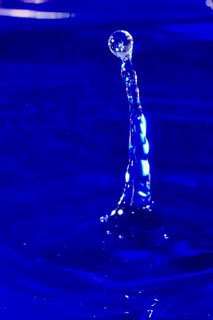
- Other colored gels. In the example video the only gel used was blue, yielding a strong blue color to the water. You can use any gel color you want as seen in the other example photos.
- Nikon SG-3IR Panel (aka SG-31R). This optional item installs in your camera's hot shoe and can be lowered to block the on-camera flash. It permits only infrared light to pass though it. Since IR is what the Nikon CLS system uses it will let your camera fire the slaves, but because it it otherwise opaque it will keep your on-camera flash from shining anywhere in the actual photograph.
- One thing that I wasn't using at the time, but would be very helpful, is a remote camera trigger. These are available wirelessly for some cameras, but due to the lag that they would introduce I would recommend a wired cable release system. I have the cheaper no-name version of the Nikon ML-3 Remote Control and I would have used it here, but it would have just made the video longer and you don't *need* it to take the picture so I downgraded it to being an optional component.
- An optional setup, with the same gear listed above, would be to use the strobe-feature of the flashes. This setting will fire a series of flashes very close together whose total illumination value nets an overall proper exposure. This can create a dramatic view of the drops falling and splashing all around.
- Another optional setup is the water source for the drips. You could suspend a bag with a small hole in it or even use a syringe to gently push out a drop on cue.
Settings
In the video you will see how I set my camera and the lighting ratios I chose. Basically I went for the depth-of-field of around f/18 and I dialed the on-camera flash level down, kept the side light balanced (unadjusted), and put the gelled flash to minus two-thirds (aka -0.7).
These numbers are not set in stone and I encourage you to play around with lesser and greater depths of field as well as other lighting ratios. I tried many configurations, but I found this to be a good starting point for myself.
Video Demonstration
The following video outlines how to setup the items to take the water drip photos.
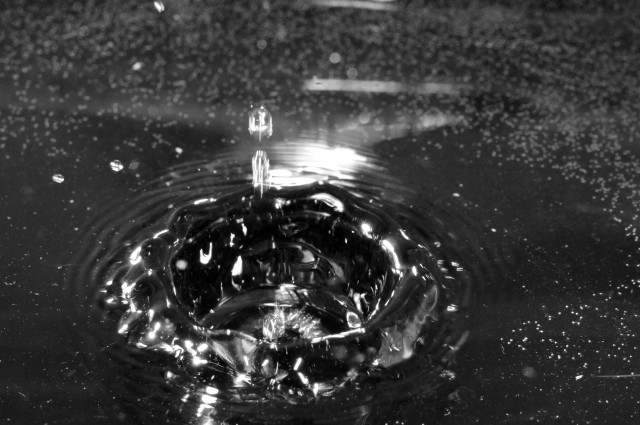
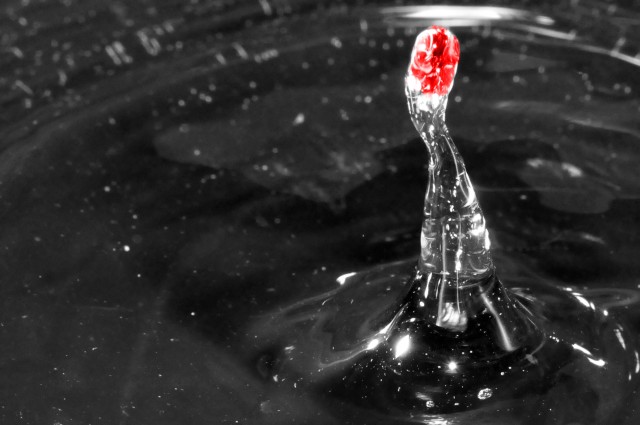
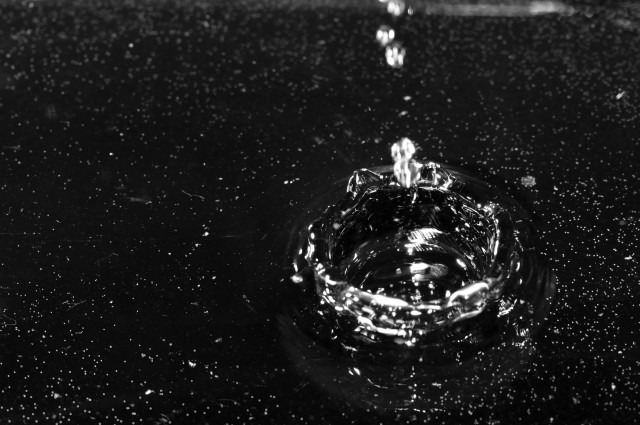
Example Photos