LensBaby 3g
 I'd get one
here.
I'd get one
here.
Introduction
This is a review of the 3g lensbaby that has all of the info in I wish I had before I bought mine. If I had this info I would still have bought mine, but I might have waited a little.
This review is based on one that I wrote in 2007 for a certain retail website.
I bought this lens figuring it would be more of a novelty toy than a daily user kind of lens, and it has been just that. I recommend going into things with that in mind for your budgeting the cost. I have seen many images by other photographers that were obviously done by a lensbaby and I felt that the effect wasn't always good or it was overdone. However, I've seen other images I liked and learned later a lensbaby was used.
This truly artistic use was what made me finally get one - I wanted to push myself to use it so it wasn't so obvious but have the effect be worth it.
Specifications
Effective focal length: about 50mm. This changes as you telescope the lens elements in or out, but it is in the neighborhood of 50mm.
Maximum Aperture: f/2.8 or f/2.0 - Before I purchased this lens I read that it was an f/2.8, but once I got it I found out that f/2.8 is the largest sized aperture ring you can add to the bare lens. But, the lens works "bare" very well and then it is f/2.0.
Also, keep in mind that this the just the aperture of the lens and does not account for what we call "bellows factor." Bellow factor is the amount of light lost due to your bending and stretching of the bellows. This means that although you setup the lens with the f/2.8 aperture ring, there could be some additional light lost reducing the effective aperture to more like f/3.4. This can be confusing if you're using a camera that won't meter this lens (like the D80 or a D50) and you're using a hand-held light meter (like the Sekonic L-358) to get a shutter speed setting for your ISO.
Minimum Aperture Ring: f/22
The lens comes with 7 aperture rings giving you 8 setups, if you count bare as a setup.
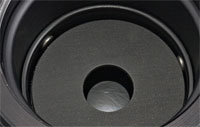
In my mind I thought you slipped the rings in behind the lens
like a traditional lens
Although you can change aperture rings with the supplied magnet, I haven't done a lot of it as I find it to be a little awkward and I like the small "sweet spot" that you get with shooting more open. Also, the magnet has the little aperture-ring holder and I find that taking the lid off of the holder is difficult. I have to apply a lot of pressure and I worry about being out in some field somewhere scattering all of the little metal aperture rings all over.
Bokeh: There is great potential for excellent bokeh due to the purely round aperture rings. However, if you have extreme bends of the lens bellows you can create some very distracting and highly-distorted scenes, which sort of defeats the goal of a nice, pleasing, subdued and blurred background.
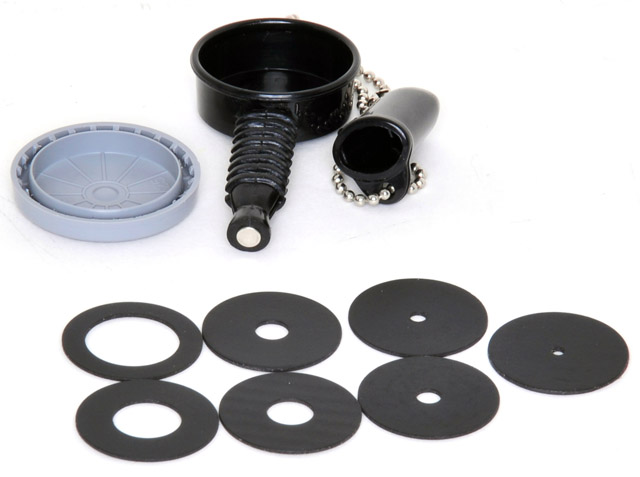
Seen here is the little aperture ring holder case
and its attached magnet for manual ring changing.
Also displayed are the kit of rings of various inside
diameters.
Performance
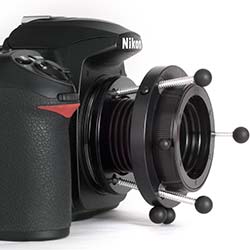
First off, I don't leave this lens on my camera so I have to take it with me. The lens doesn't fit easily into my camera bags with its gangly pins going all over and often getting caught on something when I insert or remove it from the bag. Also, the magnetic ring-changer thing with the rings in it is yet another thing that you have to carry with you (or usually forget, like I do).
Second, and perhaps most important, is that unless you have a Dx00 or better camera body (such as the D200, D300, D2, D3, etc) this lens will not meter on your camera body and you will have to shoot fully manual. This is not the fault of the lens or the lens maker, since to equip this lens with anything like a D-chip is impossible due to all of the ways you can bend it, and the weird aperture ring setup. I fault the camera makers for not supplying what has to be just $50 worth of parts to cameras like the D50 or D80 to equip them with the ability to meter lenses like this one. If the camera can judge the quantity of light coming into it then it should be able to meter any lens, regardless of if it has a regular aperture ring or not.
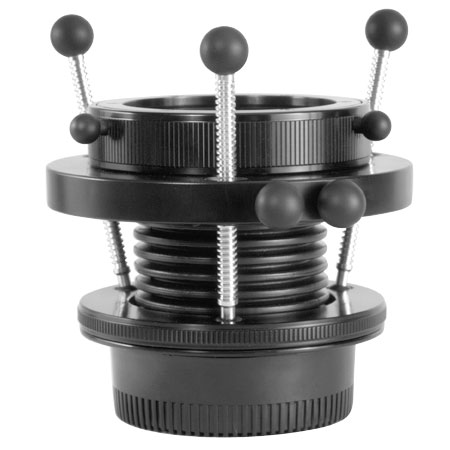
Operation
Next, I want to talk about lens operation. Like you I saw all of the pictures with the three pins sticking out and at first it scared me as I recently had three pins inserted in my wrist. I didn't know how these lens pins really worked and that lack of knowledge led me to not get a lens for longer period of time. I wish there was a little demo video somewhere since seeing it in action makes all the difference. So, let me tell you how the thing works even if I don't have a video.
 The lens has two modes: locked and unlocked. In unlocked the thing bends
and flexes easily to your pushing and pulling. You don't notice the pins
at all as you freely move the bellows. You can bellow it straight out and
in (telescoping), left / right, up / down, as well as combination of in/up
and out/left, all to your heart's content. I recommend that when doing this
you should put the outer manual focus ring in the middle of its travel.
Once you get your "sweet spot" lined up in the general direction (for example
let's say "left and out") you push a single button located on the topside,
in the area of your shutter release button on your camera body. Press that
button and immediately the lens locks in. It comes with a nice feeling of a
sturdy spring snap locking it all together.
The lens has two modes: locked and unlocked. In unlocked the thing bends
and flexes easily to your pushing and pulling. You don't notice the pins
at all as you freely move the bellows. You can bellow it straight out and
in (telescoping), left / right, up / down, as well as combination of in/up
and out/left, all to your heart's content. I recommend that when doing this
you should put the outer manual focus ring in the middle of its travel.
Once you get your "sweet spot" lined up in the general direction (for example
let's say "left and out") you push a single button located on the topside,
in the area of your shutter release button on your camera body. Press that
button and immediately the lens locks in. It comes with a nice feeling of a
sturdy spring snap locking it all together.
To unlock the lens there are two little knob-like things on the opposite
side of the lens body that you pinch together. This serves to open the grip
on the three pins and cocks the spring; ready to snap when you hit the button
 described above.
Personally, I recommend setting the sweet spot only slightly off from center. The further you bend it, the more it blurs things on the other side, and this blur can be distracting depending on the background. Following the rule-of-thirds you wouldn't want to be 50% between center and the edge anyway for your shot composition.
Now that you have locked things in (or locked, unlocked, moved, locked again) you can use the outer focus ring, similar to those on lenses you already know and love, to dial in the exact focus in your "sweet spot." Above I recommended leaving it in the middle position so that now you have the full range front and back to play with.
Changing the focus (sometimes I have to move the camera relative to the subject) can move the sweet spot around slightly. No worries, the three pins are actually tapped (they have screw flanges running their entire length) and if you turn them (they have handy little black plastic knob things on each end) you can slowly and slightly adjust the lens bellows angle, dialing in your sweet spot again.
(Warning: math speak in this paragraph) In my mind I picture it like two planes in space. The one plane is the film (or digital sensor) in your camera. The other plane is what is in focus. For a normal lens this plane runs parallel to your film and you move it in and out with the focus and lens zoom. Anything that touches this plane is rendered in focus on the parallel plane of your film. With a LensBaby you still have the film plane, but as you bend the bellows you move the focus plane around with it so it no longer runs parallel to the film. The film can still only render things in focus that lie on a focus plane parallel with it, so the "sweet spot" is the intersection of a plane running parallel to the film and the adjusted bellows plane.
Recommendation
I still consider this more of a toy that I doubt will see much use in for-pay or day-to-day photo work, but I will continue to try to use it in ways that aren't obviously done with a LensBaby, and I promise to not over use it, as fun as it may be at times.
I wouldn't recommend this as a first or an early lens purchase since its usefulness isn't that great. I would like to see you own one of the 50mm brothers (50mm f/1.8D or 50mm f/1.4D) before investing in this lens because you can do a lot more with either of those lenses than you can with a LensBaby.
Alternatives
There is no real other competing lens that is directly like this product from LensBabies.
LensBaby has made two earlier versions and since they both lack the locking pins I don't recommend them either since you'd need 3 or 4 hands to run you camera (one to hold the lens, one to set the shutter/ISO/other configuration, one to steady your subject, one to focus, and one to fire the shutter).
Nikon has released a PC, or "Perspective Control," lens, the Nikon 24mm PC-E. It is very expensive, but should permit a landscape or architectural photographer many of the same tilt/shift opportunities with a lot more fine control. As I don't do a lot of this type of work there is no way I can warrant the costs of that $1,900 lens so I cannot make any direct comparisons or recommendations based on it.
Examples
Following are some sample photos to demonstrate the power of this type of lens and some general uses which will likely yield good results. If you shoot things like these, then this lens may be a good one to think about adding to your camera bag.
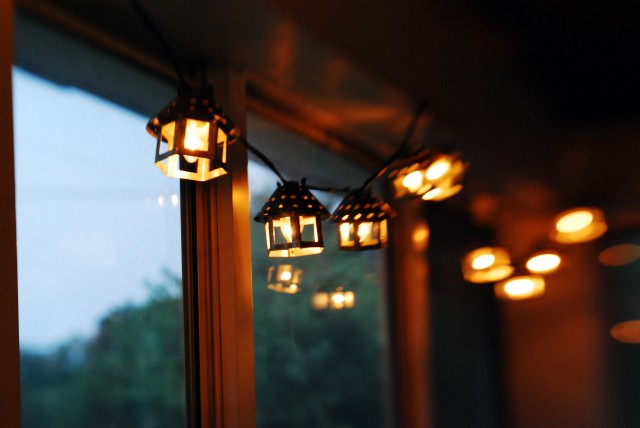

See, I think that if it isn't used quite right (often shot too open) you can make the viewer's eyes hurt. Or make them think they have glaucoma.

Above is a model, and I find this photo to be well done and not annoying. Plus, she really loved the unique look so it was a big win for me.

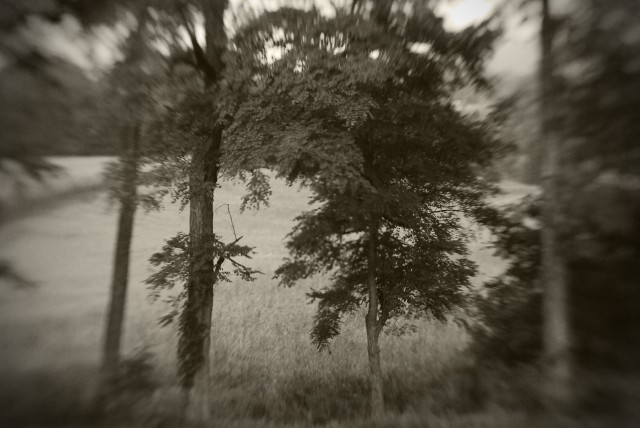
The above gear is a fantastic photo by photographer Howie Hartman. You can check out more of his work at doublehmedia.com. This photo gives a sense of motion yet something that old and dusty isn't moving and this duality is very interesting and creates a wonderful photograph.

Above is also by Howie and was taken at Dorney Park. Again, movement is key to this photo and although motion-blur is not created by the normal "pan with the subject" technique, this interesting spin on motion created by the lensbaby is another great example of a good use of this lens.