Elmo 70-125mm f/2.8 Projector Lens
Introduction
The ELMO company is likely not a brand of lens you have heard about before as they do not make traditional camera lenses. Founded in 1921 in Japan, ELMO (I tend to use "Elmo" as the spelling) is an acronym for "Electricity Light Machine Organization".
Cheap, affordable, inexpensive, these are some great ways to describe how affordable this projector lens is. Easily found for under $25USD you can adapt it to work with your camera to focus near and far and take some pretty nice pictures.
Specifications
The lens is setup with several elements and groups; I am still researching these values.
Maximum Aperture: f/2.8
Minimum Aperture: f/2.8 (there is no movable iris, the lens is fixed at f/2.8)
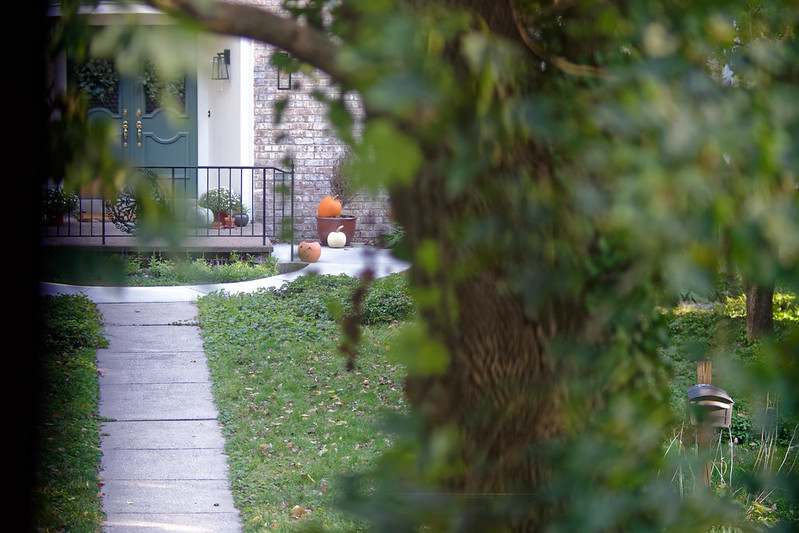
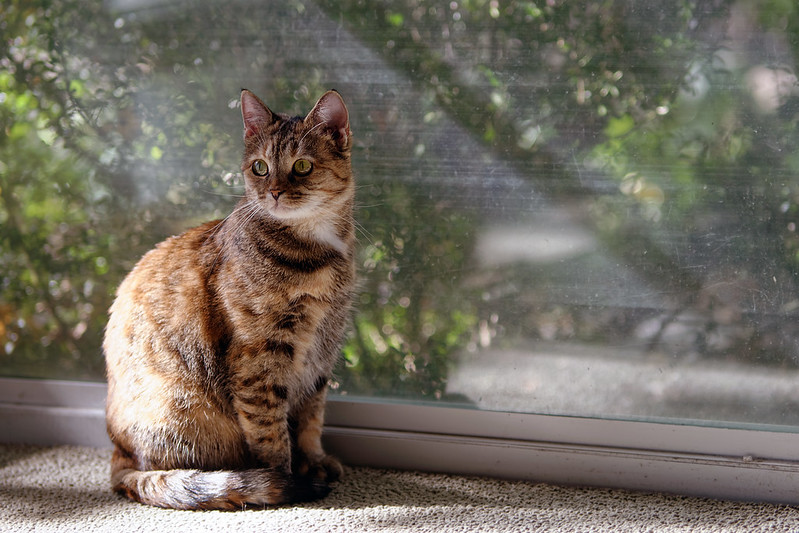
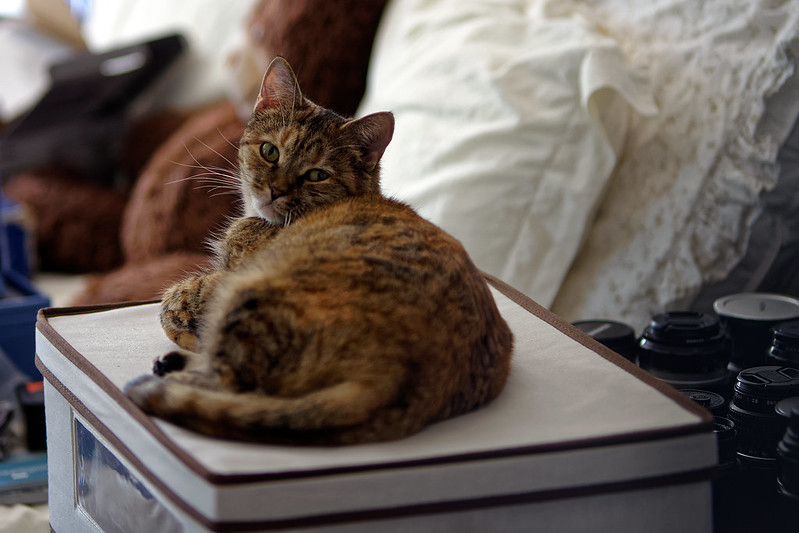
There is decent bokeh with mostly smooth blur and some rounded points of light.
The lens is strictly manual focus after you convert it to work with your camera.
Construction
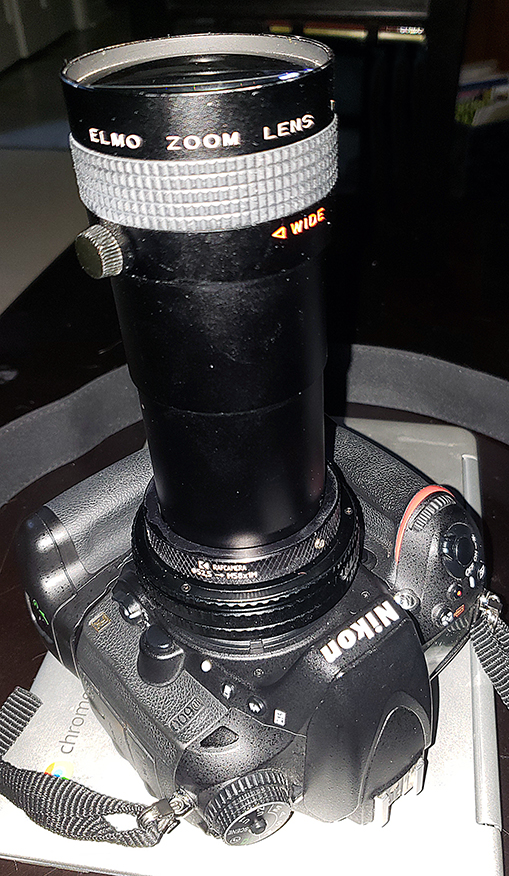
The lens itself is all metal with a set screw to set the zoom. But let's talk about how I adapted it to work on Nikon as that is likely of greater interest.
To begin, my lens sample had a section of ridges screwed onto it so it could be focused on the original projector. This ridge section was easily removed with the two phillips-head screws via a small screw driver.
To make the adaptor I started with a 58mm ring that has three small set screws on it to hold a lens/tube inside of its diameter. Don't install this onto the Elmo lens right away as the lens needs to pass through the ring a certain amount.
Next select your 58mm-58mm helicoid for the focus range you need. I started with a 17-31mm helicoid which let me focus to infinity and down to about 5 or 6 feet (roughly 2 meters). This length is affordable among 58mm helicoids and works well for this length of lens. However, you can opt to use something longer, like a 25-50mm or longer. A longer helicoid will permit closer focusing.
Screw the set-screw-58mm ring onto the front end of the helicoid and onto the other end affix a 58mm to Nikon adaptor. You do not need to get into the M42 range at all so we can avoid introducing extra glass that some sort of M58-M42-to-Nikon setup would entail.
Now you can insert your Elmo lens itself as deeply into the setup as you can. Once it bottoms out you can hold it in place with the three set screws.
I decided to clock my lens such that the flat surface on the barrel, which remains after removal of the ridged plated, is perpendicular to one of the set screws. This way the screw is going against a flat surface. Depending on the length of the set screws on your adapter, this configuration may not be possible.
Once assembled you can put the lens onto your Nikon camera, go into the settings and pick a focal length and f-stop, and start shooting. The aperture will remain fixed at f/2.8 so I recommend shooting in Aperture Priority if not fully manual.
Performance
For spending a few dollars I had low expectations but I was shocked at the quality of the images. They are pretty sharp and exhibit decent contrast. The Bokeh is perfectly fine, too.
The zoom ability leaves something to be desired however. The lens can zoom down out to 70mm but the distortion at this end, from fringing and aberrations is terrible. Frankly, the lens is not usable at 70mm. Also, as you zoom, the focus changes and you will need to adjust the focus via the helicoid to compensate.
So, forget zooming, just treat the lens as a 125mm prime. That is what I have done and why I list the lens among the prime lenses on my website.
This lens conversion uses simple, off the shelf (well, eBay) parts. This is a good candidate for your first lens to try converting into being a camera lens, if you haven't played around with things in this part of the hobby before.
Alternatives
There is another affordable Elmo projector lens available that is quite similar: the 70-102mm f/3.5 which I have not used but expect similar results from it to the f/2.8 reviewed here.
Since this is isn't really a serious, professional, high-grade lens comparing it to something like the Nikkor 135mm f/2.8 Q-C seems inappropriate. But, what else is there?
The 135mm f/2.8 Q-C and just-Q and even the 135mm f/3.5 are all likely alternatives being able to work with your Nikon camera right away. They al have variable apertures, set with the aperture ring and registered via the AI-ring on your camera. These features make them quick winners. If you shop around you can find a decent Nikkor 135mm that will be very sharp and very much under $100.
So although using this Elmo lens is cheap to get started, you end up spending some money on a helicoid and the needed adaptors so the savings over a true Nikkor is negligible compared to the advantages of a true Nikkor.
But, if you get super cheap Elmo lens and make your own setup, there is a certain pride factor that doesn't come with a standard Nikkor 135 that all of your friends can easily own.
Examples
Following are some sample photos to demonstrate the power of this type of lens and some general uses which will likely yield good results. If you shoot things like these, then this lens may be a good one to think about adding to your camera bag.
Check out more photos I have shot with this lens in my Flickr Album.